AutoBlendLight
スクリーンショット
概要
自動ライティング・背景馴染ませスクリプト
詳細説明
AutoBlendLight
日本語 ▲ 🌐 Switch Language
▶️ 紹介動画(ニコニコ)
概要
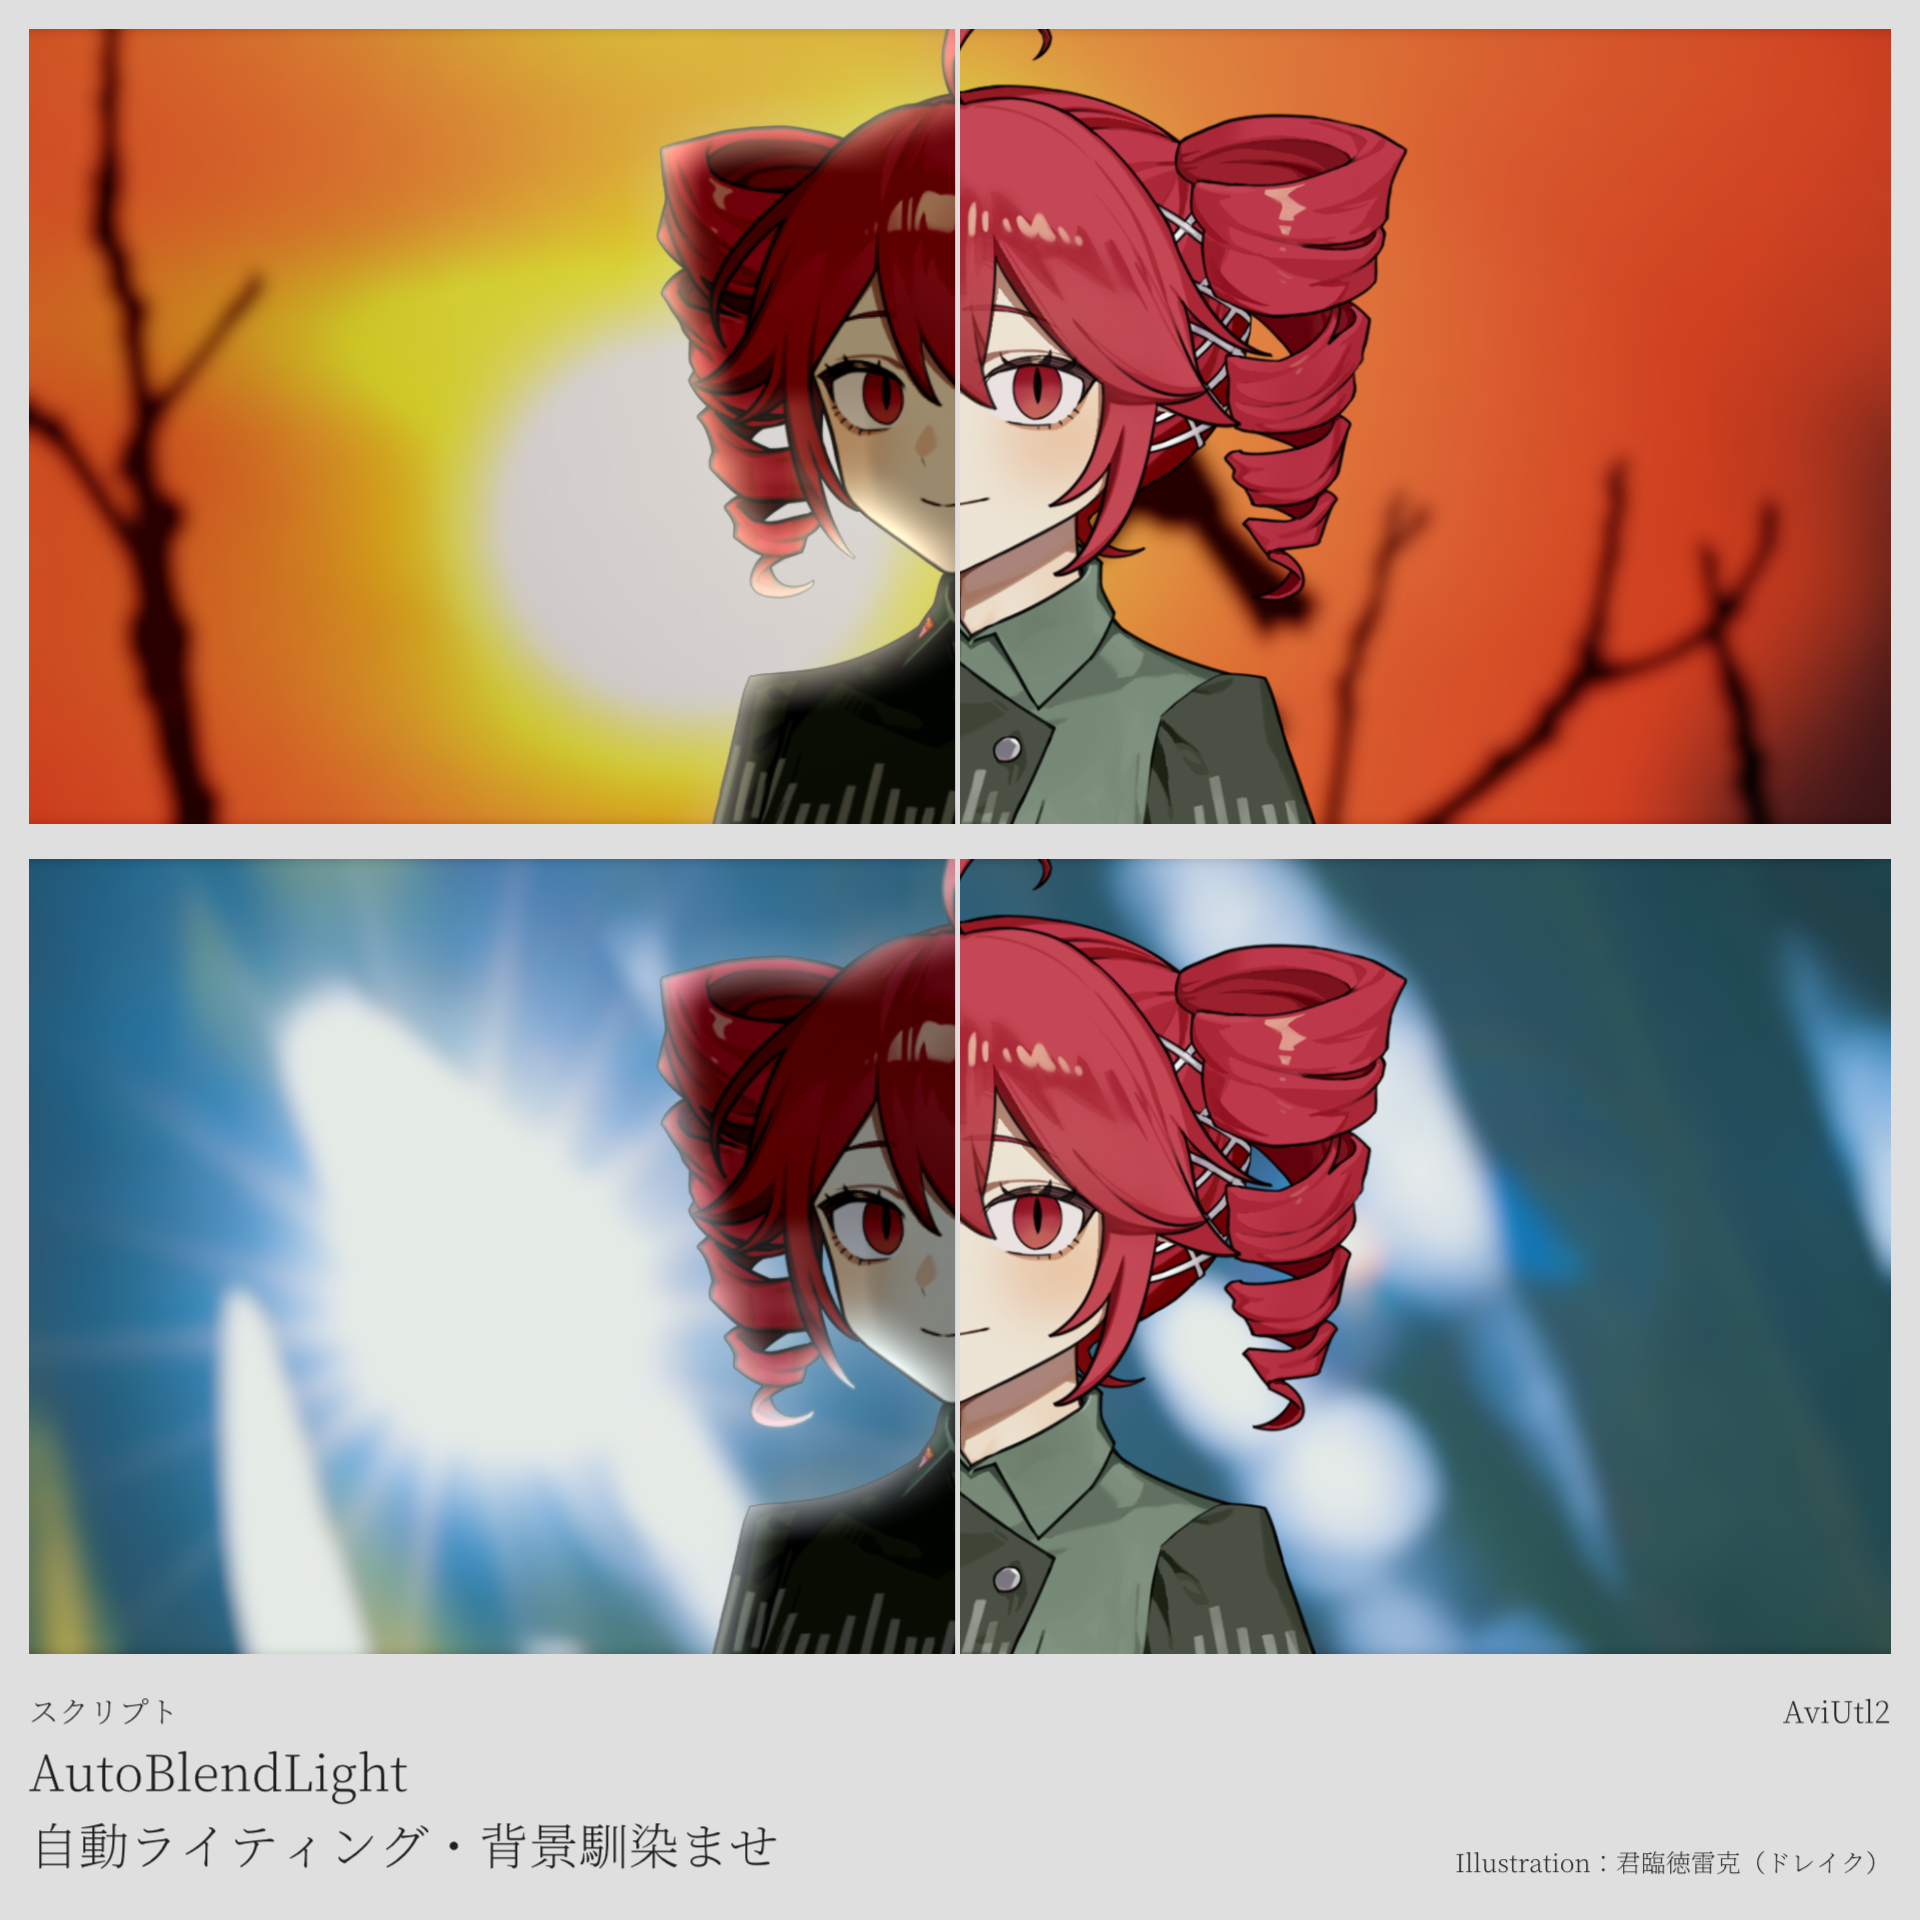
AutoBlendLight は、AviUtl2 上のオブジェクトを背景の光や色になじませるためのスクリプトです。
主に立ち絵など、背景と明るさや色味が合わないオブジェクトを自然に馴染ませる用途を想定しています。
指定したライティング範囲の中心から背景の色と明るさを取得し、その情報をもとにライティングを自動生成します。
背景側の明るさが変化した場合は、ライティングの強さも連動させることができます。
単色と左右2色のカラーモード、グラデーションと縁取りの2種類のスタイル、通常の「ライト」と逆光の切り替えに対応しています。
また、背景をオブジェクトへ乗算してなじませる 環境なじませ と、画面上に光源位置を固定する 固定光源モード も使用できます。
インストール方法
AutoBlendLight_vx.x.x.au2pkg.zipを解凍せず、AviUtl2 のプレビュー画面へ直接ドラッグ&ドロップします。- 表示された内容を確認してインストールします。
- 対象のオブジェクトへアニメーション効果を追加し、一覧から
AutoBlendLightを選択します。
パッケージにはスクリプト本体と、英語・簡体中国語表示用の言語ファイルが含まれています。
表示言語は AviUtl2 の言語設定に合わせて自動的に切り替わります。
基本操作
AutoBlendLight は、背景がすでに描画されている状態で使用してください。
スクリプトは現在の背景を読み取り、ライティング用の色と明るさを取得します。
オブジェクト
対象オブジェクト側の明るさを調整します。
背景との明暗差が大きい場合に、ライティングを適用する前の基礎的な明るさを整えるために使用します。
ライティング
背景から取得した色を使ってオブジェクトへライティングを追加します。
カラーモード では、単色または左右2色を選択できます。
2色モードでは、ライティング範囲の左右から取得した色を使って、左右で異なる光を合成します。
スタイル では、柔らかく広がる グラデーション と、輪郭付近へ光を出す 縁取り を切り替えられます。
グラデーションでは 逆光 のON/OFFを切り替えられます。
ONでは逆光、OFFでは通常の AviUtl2「ライト」として動作します。
明るさ連動 を有効にすると、ライティング範囲内の背景の明るさに合わせて光の強さが変化します。
点滅する照明や、明るさが変化する背景にも追従できます。
ライティング範囲
背景から色と明るさを取得し、ライティングを適用する範囲を設定します。
X / Y、サイズ、角度、縦横比、縁ぼかしを調整できます。
プレビュー上の中心アンカーをドラッグして、ライティング範囲の位置を移動できます。
背景の光源がある位置へ中心を合わせると、取得する色と明るさを調整しやすくなります。
環境なじませ
背景をぼかしてオブジェクトへ乗算し、背景の色味をオブジェクトへなじませます。
ライティングとは別の処理なので、逆光を弱くした状態でも背景との色の差を抑える用途に使用できます。
背景ぼかしを調整すると、細かい背景模様の影響を抑えながら全体の色味だけを反映できます。
固定光源
通常はライティング範囲がオブジェクトと一緒に移動します。
固定光源モード を有効にすると、ライティング範囲の中心を画面側へ固定できます。
オブジェクトが移動して光源の近くへ入ったり、光源から離れたりするような場面で使用できます。
注意事項
- 背景の色と明るさを読み取るため、AutoBlendLight を使用する時点で背景が描画されている必要があります。
- 大きな画像では、GPU負荷と画像バッファ使用量を抑えるために内部処理を軽量化する場合があります。
- 大きな画像とクリッピング、左右2色モードの併用に対応しています。
- AutoBlendLight より下に配置した「ぼかし」「色調補正」などの効果も使用できます。
- 固定光源モードでは、光源位置とオブジェクト位置を別々に扱います。
中文
概要
AutoBlendLight 是用于让 AviUtl2 中的对象更自然地融入背景光照和色彩的脚本。
主要适合立绘等与背景亮度、颜色差异较大的对象。
脚本会从指定光照区域的中心读取背景颜色和亮度,并根据这些信息自动生成光照效果。
当背景亮度发生变化时,也可以让光照强度跟随变化。
支持单色与左右双色模式、渐变与描边两种光照样式,并可在普通「ライト」与逆光之间切换。
此外还提供将背景颜色乘算到对象上的 背景融合,以及将光源位置固定在画面中的 固定光源模式。
安装方法
- 不要解压
AutoBlendLight_vx.x.x.au2pkg.zip,直接将其拖放到 AviUtl2 的预览画面。 - 确认显示的内容后进行安装。
- 给需要处理的对象添加动画效果,然后从列表中选择
AutoBlendLight。
安装包包含脚本本体,以及英文和简体中文界面所需的语言文件。
显示语言会根据 AviUtl2 的语言设置自动切换。
基本操作
请在背景已经绘制完成的情况下使用 AutoBlendLight。
脚本会读取当前背景,并取得生成光照所需的颜色和亮度。
对象
调整对象本身的基础亮度。
当对象与背景之间的明暗差距较大时,可以先在这里调整,再进行后续光照处理。
光照
使用从背景取得的颜色为对象添加光照。
颜色模式 可以选择单色或左右双色。
双色模式会分别取得光照区域左右两侧的颜色,再将两种光照进行合成。
样式 可以在柔和扩散的 渐变 与强调轮廓的 描边 之间切换。
在渐变模式下可以切换 逆光。
开启时使用逆光,关闭后则使用普通的 AviUtl2「ライト」。
开启 亮度联动 后,光照强度会根据光照区域内的背景亮度变化。
因此也可以跟随闪烁灯光、显示器亮度变化等动态光源。
光照区域
设置读取背景颜色和亮度、以及应用光照的范围。
可以调整 X / Y、尺寸、角度、纵横比和边缘模糊。
也可以直接拖动预览画面中的中心锚点来移动光照区域。
将区域中心放在背景中的光源附近,通常更容易得到合适的颜色和亮度。
背景融合
将模糊后的背景以乘算方式应用到对象上,使对象的整体色调更接近背景。
它与光照是独立处理,因此即使不需要很强的逆光,也可以单独用它来减少对象与背景之间的色差。
调整背景模糊后,可以减少细小背景纹理的影响,只保留整体环境色。
固定光源
默认情况下,光照区域会跟随对象一起移动。
开启 固定光源模式 后,可以将光照区域中心固定在画面上。
适合表现对象移动到光源附近、离开光源,或者穿过固定灯光区域的场景。
注意事项
- AutoBlendLight 需要读取背景颜色和亮度,因此使用时背景必须已经完成绘制。
- 对于超大图片,脚本可能会自动使用较轻量的内部处理来降低 GPU 和图像缓冲区负载。
- 支持超大图片与裁剪、左右双色模式组合使用。
- 放在 AutoBlendLight 下方的模糊、色调调整等效果也可以正常使用。
- 固定光源模式会分别处理光源位置与对象位置。
English
Overview
AutoBlendLight is an AviUtl2 script for making an object blend more naturally with the lighting and color of its background.
It is mainly intended for character illustrations and other objects whose brightness or color does not match the scene.
The script samples the background color and brightness from the center of the selected Lighting Area, then automatically generates lighting from that information.
Lighting strength can also react to changes in background brightness.
It supports Single Color and Dual Color (Left/Right) modes, Gradient and Outline styles, and switching between normal AviUtl2 Light and backlighting.
It also includes Background Blend, which multiplies a blurred version of the background onto the object, and Fixed Light Mode, which keeps the light position fixed on the screen.
Installation
- Do not extract
AutoBlendLight_vx.x.x.au2pkg.zip. Drag and drop it directly onto the AviUtl2 preview window. - Review the displayed contents and install the package.
- Add an Animation Effect to the target object and select
AutoBlendLightfrom the list.
The package includes the script and the language files required for English and Simplified Chinese UI text.
The displayed language follows the AviUtl2 language setting automatically.
Basic Usage
Use AutoBlendLight after the background has already been rendered.
The script reads the current background to obtain the color and brightness used for lighting.
Object
Adjusts the base brightness of the target object.
Use this when the object is much brighter or darker than the background before applying the lighting effect.
Lighting
Adds lighting to the object using colors sampled from the background.
Color Mode can be set to Single Color or Dual Color (Left/Right).
Dual Color mode samples the left and right sides of the Lighting Area separately, then combines the two lighting results.
Style switches between a soft Gradient and an Outline style concentrated around the object's edges.
In Gradient mode, the Backlight option can be turned on or off.
When disabled, AutoBlendLight uses the normal AviUtl2 Light effect instead of backlighting.
When Brightness Link is enabled, lighting strength reacts to the brightness inside the Lighting Area.
This allows the effect to follow flickering lights, displays, and other changing light sources.
Lighting Area
Defines the area used to sample background color and brightness and to apply the lighting.
X / Y, Size, Angle, Aspect Ratio, and Edge Blur can be adjusted.
The center anchor can also be dragged directly in the preview window.
Placing the center near a visible light source in the background usually makes it easier to obtain suitable color and brightness.
Background Blend
Multiplies a blurred copy of the background onto the object so its overall color sits closer to the scene.
Background Blend is processed separately from Lighting, so it can also be used when only a small amount of backlighting is needed.
Background Blur can reduce the influence of small background details while retaining the overall environmental color.
Fixed Light
By default, the Lighting Area moves together with the object.
When Fixed Light Mode is enabled, the center of the Lighting Area can remain fixed on the screen.
This is useful for scenes where an object moves toward, away from, or through a stationary light source.
Notes
- AutoBlendLight samples background color and brightness, so the background must already be rendered when the effect is evaluated.
- Very large images may use a reduced internal working buffer to lower GPU and image-buffer usage.
- Large images can be used together with clipping and Dual Color mode.
- Effects placed below AutoBlendLight, such as Blur or Color Correction, can still be used.
- Fixed Light Mode treats the light position and object position separately.