RainOnPane
スクリーンショット
概要
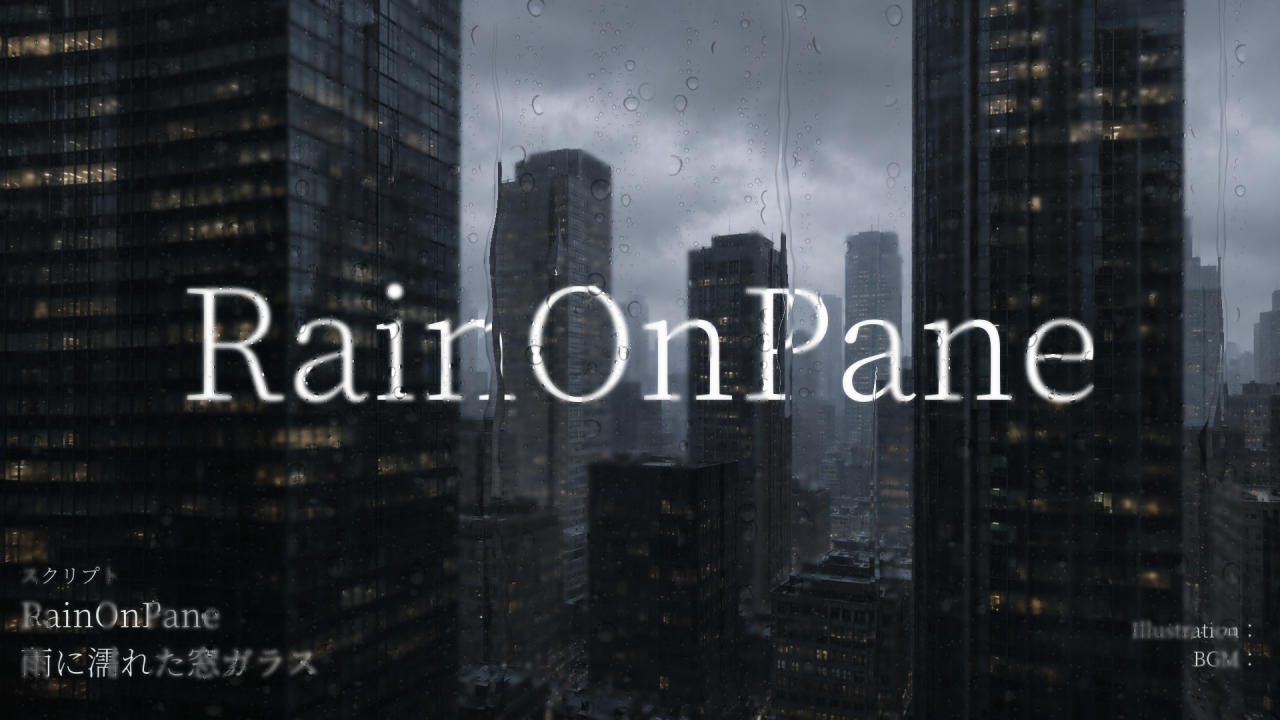
雨に濡れた窓ガラスを再現するカスタムオブジェクトです。
詳細説明
RainOnPane

▲ ▼ クリックして動画を再生
▶️ 紹介動画(ニコニコ動画)
日本語 ▲ 🌐 Switch Language
概要
RainOnPane は、AviUtl2 で雨に濡れた窓ガラスを再現するカスタムオブジェクトです。
ガラスに付着する雨粒、下へ流れる水、水による背景の屈折、雨筋、すりガラス、曇りを生成できます。
水流の先端が通過した場所では雨粒と曇りが取り除かれ、その後、時間の経過に合わせて徐々に再付着します。
雨筋は現在時刻から解析的に再構築されるため、タイムラインを移動しても一貫した状態を再現できます。
四隅変形を有効にすると、プレビュー上の四隅をドラッグして、背景内の任意の窓へ効果を合わせられます。
RainOnPane は 「カスタムオブジェクト」 から選択できます。
インストール方法
RainOnPane_vx.x.x.au2pkg.zipを解凍せず、AviUtl2 のプレビュー画面へ直接ドラッグ&ドロップします。- 表示された内容を確認してインストールします。
- カスタムオブジェクトを作成し、一覧から
RainOnPaneを選択します。
パッケージにはスクリプト本体と、英語・簡体中国語表示用の言語ファイルが含まれています。
表示言語は AviUtl2 の言語設定に合わせて自動的に切り替わります。
基本操作
RainOnPane は、処理したい背景の描画が完了した後に配置してください。
このオブジェクトは、それ以前に描画された画面を読み取り、ガラス効果を合成します。
雨粒
ガラスに付着する微細な雨粒と、より密度の低い大きな雨粒を設定します。
密度、サイズ、更新速度、雨粒屈折を調整できます。更新速度を 0 にすると、雨粒の配置は静止します。
サイズは 300 前後がおすすめです。
流れ
下へ移動する水流の数、長さ、太さ、流速、屈折を設定します。
各水流の長さ、速度、経路、局所的な太さはランダムに変化します。数または流速を 0 にすると水流を無効にできます。
数を増やしすぎると水流同士が重なりやすくなります。
雨筋
水流が通過した後に残るクリアな経路を設定します。
雨筋幅、曇り除去、雨粒除去、縁の巻込み、雨筋保持時間を調整できます。
除去は水流の下側にある先端から始まり、水流の移動に合わせて経路へ広がります。
再付着
雨筋保持時間が終了した後、曇りの回復時間と雨粒の再付着時間を個別に設定します。
単位は秒です。値が大きいほど回復が遅くなります。
ガラス
濡れ、立体感、水のボケ、ランダム、透明度、シードを設定します。
シードを変更すると雨粒の配置と水流経路が変わり、同じ値を使用すると同じ雨の状態を再現できます。
すりガラス
背景全体にすりガラス状の拡散を追加します。曇りと併用できますが、水流では除去されません。
ぼかしと強度の初期値はどちらも 0 です。強度が 100 を超えると、完全に混合した後も実際のぼかし半径が拡大します。
目安として、ぼかし 5、強度 100 がおすすめです。
曇り
横方向と縦方向の 13 タップ・ガウスぼかしで、ガラスの曇りを表現します。
ぼかしと強度の初期値はどちらも 0 です。雨粒と水流は曇りより前面に、クリアな状態で描画されます。
目安として、ぼかし 10、強度 200 がおすすめです。
変形
四隅変形を有効にすると、雨窓全体を任意の四角形へ透視変形できます。
オブジェクトを選択し、プレビュー画面に表示される左上、右上、右下、左下のアンカーを直接ドラッグしてください。斜めの窓へ合わせる場合も四隅変形を有効にしてください。
四角形以外の形状が必要な場合は、マスクで切り抜いてください。
境界ぼかしは窓の端を柔らかくします。軽量プレビューを有効にすると、完全な雨窓処理を一時停止して背景とアンカーだけを表示します。
四隅の配置が完了したら軽量プレビューを無効にし、最終結果を確認してください。
注意事項
- すりガラスと曇りは初期状態では無効です。
- 雨粒密度、水流数、曇りのぼかしを高くすると GPU 負荷が増加します。
- 雨筋は過去 12 世代の水流経路を再構築します。
- 四隅を交差させたり、四角形を面積がほぼ 0 になるまで押しつぶしたりしないでください。
中文
概要
RainOnPane 是用于 AviUtl2 的雨窗玻璃自定义物件。
它可以生成附着雨滴、向下流动的水流、背景折射、雨痕、毛玻璃和雾气。
水流前端经过的位置会清除雨滴和雾气,之后二者会随时间逐渐重新附着。
雨痕根据当前时间进行解析重建,因此拖动时间轴后仍能得到一致的状态。
开启四角变形后,可以在预览画面中拖动四个角,将效果贴合到背景中的任意窗户。
RainOnPane 可以从 “自定义物件(カスタムオブジェクト)” 中选择。
安装方法
- 不要解压
RainOnPane_vx.x.x.au2pkg.zip,直接将其拖放到 AviUtl2 的预览画面。 - 确认显示的内容后进行安装。
- 新建自定义物件,然后从列表中选择
RainOnPane。
安装包包含脚本本体,以及英文和简体中文界面所需的语言文件。
显示语言会根据 AviUtl2 的语言设置自动切换。
基本操作
请将 RainOnPane 放在需要处理的背景绘制完成之后。
该物件会读取此前已经绘制的画面,再合成玻璃效果。
雨滴
设置附着在玻璃上的微小雨滴和较稀疏的大雨滴。
可以调整密度、尺寸、更新速度和雨滴折射。更新速度设为 0 时,雨滴布局保持静止。
尺寸推荐设在 300 左右。
水流
设置向下移动的水流数量、长度、粗细、流速和折射。
每条水流的长度、速度、路径和局部粗细都会随机变化。数量或流速设为 0 时可以关闭水流。
数量过多时,水流之间容易出现重叠。
雨痕
设置水流经过后留下的清晰路径。
可以调整雨痕宽度、雾气清除、雨滴清除、边缘卷入和雨痕保持时间。
清除从水流下方的前端开始,并随着水流移动扩展到经过的路径。
再附着
雨痕保持时间结束后,可以分别控制雾气恢复和雨滴重新附着所需的时间。
数值单位为秒,数值越大,恢复越慢。
玻璃
设置湿润程度、立体感、水体模糊、随机程度、透明度和随机种子。
更改随机种子会改变雨滴布局和水流路径;相同数值可以重现相同的雨况。
毛玻璃
为整个背景添加毛玻璃式扩散。它可以和雾气一起使用,但不会被水流清除。
模糊和强度的默认值均为 0。强度超过 100 后,除了完整混合之外,还会继续扩大实际模糊半径。
推荐从模糊 5、强度 100 开始调整。
雾气
使用横向和纵向的 13 点高斯模糊模拟玻璃雾气。
模糊和强度的默认值均为 0。雨滴和水流会保持在雾气前方清晰显示。
推荐从模糊 10、强度 200 开始调整。
变形
开启四角变形后,可以将完整雨窗效果透视映射到任意四边形。
选中物件,然后直接拖动预览画面中的左上、右上、右下和左下锚点。贴合倾斜窗户时也需要开启四角变形。
如果需要其他形状,请使用遮罩(マスク)进行裁切。
边界模糊用于柔化窗户边缘。开启轻量预览后,完整雨窗渲染会暂时停止,只显示背景和锚点。
完成四角定位后,请关闭轻量预览以检查最终效果。
注意事项
- 毛玻璃和雾气默认关闭。
- 很高的雨滴密度、水流数量和雾气模糊会增加 GPU 负载。
- 雨痕会重建过去 12 代水流路径。
- 请勿让四个角互相交叉,也不要将四边形压缩到接近零面积。
English
Overview
RainOnPane is an AviUtl2 custom object for recreating rain on a window.
It generates attached droplets, downward-moving water streaks, background refraction, rain marks, frosted glass, and fogging.
Droplets and fogging are removed where the leading edge of a streak passes, then gradually reattach over time.
Rain-mark history is reconstructed analytically from the current time, so timeline seeking produces a consistent state.
When Four-Corner Transform is enabled, you can drag the four corners in the preview to fit the effect onto any window in the background.
RainOnPane can be selected from Custom Object (カスタムオブジェクト).
Installation
- Do not extract
RainOnPane_vx.x.x.au2pkg.zip. Drag and drop it directly onto the AviUtl2 preview window. - Review the displayed contents and install the package.
- Create a Custom Object and select
RainOnPanefrom the list.
The package includes the script and the language files required for English and Simplified Chinese UI text.
The displayed language follows the AviUtl2 language setting automatically.
Basic Usage
Place RainOnPane after the background that you want to process has been drawn.
The object reads the previously rendered frame and composites the glass effect over it.
Droplets
Controls the dense micro-droplets and the sparser large droplets attached to the glass.
Density, Size, Renewal Speed, and Droplet Refraction are adjustable. Setting Renewal Speed to 0 keeps the droplet layout static.
Size of around 300 is recommended.
Streaks
Controls the count, length, width, speed, and refraction of downward-moving water streaks.
Length, speed, path, and local width vary between streaks. Setting Count or Speed to 0 disables the streaks.
Very high counts can cause streaks to overlap frequently.
Rain Marks
Controls the clear paths left after water streaks pass.
Rain Mark Width, Fog Removal, Droplet Removal, Edge Capture, and Rain Mark Hold Time are adjustable.
Clearing begins at the lower leading edge and extends along the travelled path as the streak moves.
Reattachment
Controls the time required for fogging and droplets to return after the Rain Mark Hold Time ends.
Values are measured in seconds. Higher values produce slower recovery.
Glass
Controls Wetness, Depth, Water Softness, Randomness, Opacity, and Seed.
Changing Seed creates a different droplet layout and set of streak paths; the same value reproduces the same rain pattern.
Frosted Glass
Adds frosted-glass diffusion to the entire background. It can be used together with Fogging, but it is not removed by water streaks.
Frost Blur and Frost Strength both default to 0. Above 100, Frost Strength continues to increase the physical blur radius after the blend reaches full strength.
Frost Blur 5 and Frost Strength 100 are recommended starting values.
Fogging
Uses horizontal and vertical 13-tap Gaussian blur passes to simulate fogged glass.
Fog Blur and Fog Strength both default to 0. Droplets and streaks remain clear in front of the fogged background.
Fog Blur 10 and Fog Strength 200 are recommended starting values.
Transform
Four-Corner Transform projects the complete rain effect onto an arbitrary quadrilateral.
Select the object, then drag the Top Left, Top Right, Bottom Right, and Bottom Left anchors directly in the preview window. Enable Four-Corner Transform when fitting the effect to a tilted window.
Use a Mask (マスク) to crop the effect when a shape other than a quadrilateral is required.
Edge Feather softens the pane boundary. Lightweight Preview temporarily pauses the complete rain rendering and shows only the background and anchors.
Disable Lightweight Preview after positioning the corners to inspect the final result.
Notes
- Frosted Glass and Fogging are disabled by default.
- Very high droplet density, streak count, and fog blur increase GPU workload.
- Rain marks reconstruct the previous 12 generations of streak paths.
- Do not cross the four corners or collapse the quadrilateral to nearly zero area.